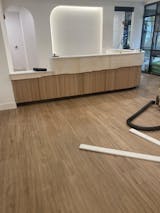
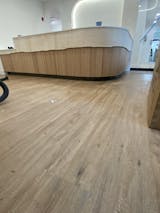
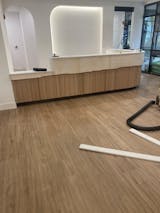
Flexible Wood Tambour is a versatile and elegant solution for interior design, offering a unique blend of aesthetic appeal and practical functionality. Ideal for adding a touch of natural warmth and sophistication to any space, this product requires careful handling and specific installation procedures to maintain its integrity and appearance. It's crucial to understand the appropriate storage, handling, finishing, and installation techniques to ensure the best results and longevity of the tambour panels. This guide provides detailed instructions on how to manage Flexible Wood Tambour effectively, from receipt to final installation, ensuring that the material retains its beauty and functionality in your interior space.
Instructions for Installation of Tambour 🛠️
Flexible Wood Tambour is an interior-only product that combines warm, natural texture with versatility. Proper storage, handling, finishing, and installation are essential to preserve its look and performance. Use this guide from receiving through final install to get reliable, long-lasting results.
Keep material flat, clean, and acclimated
- Interior use only. Not for wet or high-humidity areas (showers, bathrooms, pools).
- On receipt, store in a controlled environment; allow 24–48 hours to acclimate, lying flat.
- Before finishing or install, lightly roll/unroll to flex the backing; hold rolled position 5+ seconds then return flat.
Finish before or after install
- Use standard wood finishing techniques (paint or stain) before or after installation.
- Panels can be gently rolled or “slumped” to help finish reach between slats.
Finishing tip
- Test on an off-cut or inconspicuous area to confirm color, penetration, and adhesion.
Prep surface and use full, even adhesive coverage
- Install vertically or horizontally; always dry-fit first.
- Substrate/wall must be clean and sound (no dust, grease, or debris).
- Install in a controlled environment (standard room temp/humidity).
- Approved adhesives: PVA, contact, epoxy, or high-quality panel adhesive (e.g., Titebond Fast Grab FRP).
- For panel adhesive: trowel for 80–100% coverage to within ¼″ of edges.
Using a gun? Continuous beads around the perimeter + horizontal beads every 4–6″. - Clean any squeeze-out immediately to avoid residue on slat faces.
- Test a small area first to confirm adhesion.
- Optional: trim screws or nails at installer’s discretion.
- After placement, apply firm, uniform pressure across entire panel. Use a ¾″ sacrificial board when tapping/hammering.
- Leave a hairline gap between adjacent panels to accommodate minor movement in service.
- Do not mount cabinets/furniture through tambour into the wall; movement can cause buckling and void warranty.
Handling, Finishing, Installation
- Pre-stretch inward: Before attaching, roll the panel inward to stretch the backing.
- Flex outward with intent: Flex outward firmly to fully stretch the paper backing. Properly stretched panels are easier to handle and more compliant.
- Leave micro-gaps: Space adjacent panels roughly the thickness of two stacked business cards to allow natural wood movement.
Warranty Reminder
Warranty may be voided if panels are installed in high-moisture environments or if cabinetry/furniture is mounted through the tambour. Always follow adhesive manufacturer’s instructions.
#TambourPanels #DesignVersatility #QualityCraftsmanship #WhiteRiverHardwoods 🌟


